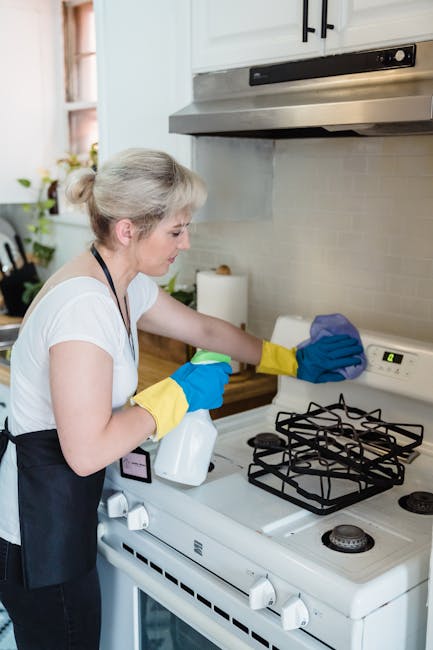
Practical oven cleaning methods pros use for spotless kitchens
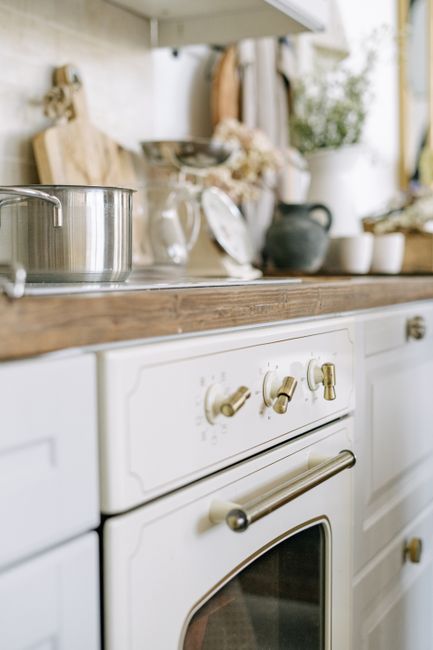
If your oven door has gone from "lightly used" to "how did it get like that?", you are not alone. Grease builds up slowly, splatters bake on, and before long the whole kitchen can feel a bit tired. The good news is that practical oven cleaning methods pros use for spotless kitchens are less about magic and more about the right order, the right products, and a steady hand. Get that combination right and the results are usually better, safer, and far less stressful than a frantic scrub on a Sunday evening.
In this guide, you will learn what professional oven cleaning actually involves, why it matters, how it works, and when it makes sense to do it yourself versus calling in help. We will also cover the common mistakes people make, the tools worth having nearby, and a few real-world tips that save time. To be fair, a clean oven does not just look better. It cooks better, smells better, and makes the whole kitchen feel more manageable.
- Why practical oven cleaning matters
- How the process works
- Key benefits and practical advantages
- Who this is for and when it makes sense
- Step-by-step guidance
- Expert tips for better results
- Common mistakes to avoid
- Tools, resources and recommendations
- Law, compliance, standards, and best practice
- Options, methods, and comparison table
- Case study or real-world example
- Practical checklist
- Conclusion
- Frequently asked questions
Why Practical Oven Cleaning Methods Pros Use for Spotless Kitchens Matters
An oven is one of the hardest-working appliances in the house, and it shows. Drips from a roast, bubbling cheese, pastry spillovers, and old carbonised grease all add up. If those deposits are left alone, they can smoke, smell unpleasant, and make the oven work harder than it should. In a busy home, that often means the kitchen never quite feels clean, even when the sink is empty and the counters are wiped down.
Professional oven cleaning is not just about appearance. It is about removing baked-on residue from the cavity, racks, door glass, fan area, and sometimes the removable panels, without damaging the appliance. In our experience, the real value is consistency. A proper clean gets into the awkward corners people usually miss, and it does so without leaving harsh chemical residue behind. That matters in a room where you prepare food every day.
There is also a small but real safety angle. Built-up grease can smoke at high temperatures, and heavy residue can make cleaning feel harder every time. You end up with a vicious circle: the dirtier it gets, the less you want to clean it. Who enjoys scraping blackened grease off a grill tray on a Tuesday night? Exactly.
Another reason this matters is long-term maintenance. A well-cleaned oven tends to run more efficiently and looks better for longer. If you are preparing a property for guests, moving out, or simply trying to keep a family kitchen under control, a spotless oven often changes the feel of the whole room.
How Practical Oven Cleaning Methods Pros Use for Spotless Kitchens Works
Professionals usually follow a simple principle: break the job into stages instead of attacking everything at once. That sounds obvious, but it is what separates a quick wipe from a proper result. The process usually starts with assessing the oven type, the level of soiling, and the materials involved. Some ovens have self-cleaning functions, some have enamel interiors, and others have delicate seals or electronic controls that need care.
The next stage is preparation. Pros typically remove loose debris, take out racks and trays, and protect surrounding surfaces. Then they apply the chosen cleaning method, allowing dwell time so the product can soften grease rather than relying on brute force. After that comes agitation, wiping, rinsing, and a final polish. Simple in theory. A bit fiddly in reality, as you will know if you have ever tried to clean around a stubborn oven hinge.
Good oven cleaning methods balance three things:
- Effectiveness - does it cut grease and carbonised residue?
- Safety - is it suitable for the oven surfaces and safe around food areas?
- Efficiency - does it save time without creating extra mess?
Pros do not always use the same technique on every oven. A lightly soiled appliance might only need a degreaser and microfiber cloths. A neglected one may need a soaking stage, repeat application, and careful attention to racks, seals, and glass. The important part is choosing the method to match the mess, not the other way round.
Key Benefits and Practical Advantages
A proper oven clean gives you more than a glossy finish. The advantages show up in day-to-day use, and they are easy to notice once the work is done.
- Better cooking results: Heat circulates more evenly when vents and fan areas are not clogged with baked-on grease.
- Less smoke and odour: Old residue burns off at high temperatures, which can affect the smell of your kitchen and food.
- Faster routine cleaning: Once the deep grime is removed, weekly wipe-downs become much easier.
- Improved presentation: A clean oven door and bright cavity make the whole kitchen feel fresher.
- Longer appliance life: Regular maintenance helps reduce stress on components and keeps surfaces in better condition.
There is also a psychological benefit, oddly enough. When an oven is spotless, the kitchen feels more under control. That can be surprisingly motivating. You clean one thing properly and suddenly you notice the worktop, the hob, the extractor hood... it snowballs in a good way.
For landlords, tenants at the end of a tenancy, or anyone getting ready for a family gathering, the practical upside is clear. A clean oven removes one of those awkward "we should really sort that" jobs that always seems to hang around. Less mental clutter. Nice.
Who This Is For and When It Makes Sense
This approach is useful for almost anyone, but it especially suits people who want a proper result without wasting time on the wrong products or techniques. If your oven gets regular use and collects grease quickly, a structured clean will save effort. If it has been neglected for months, the method matters even more because you need to avoid scratching enamel, damaging seals, or pushing grime deeper into the appliance.
It makes sense for:
- busy households that cook most days
- families dealing with frequent spillovers
- tenants and landlords preparing for inventory checks or move-out cleaning
- homeowners wanting to keep their kitchen fresher for longer
- people comparing DIY cleaning with a professional oven cleaning service
It is also a good fit if you are already doing a broader kitchen refresh. Many people pair oven cleaning with kitchen cleaning or a wider deep cleaning appointment, because once the oven is sorted, the rest of the kitchen suddenly looks less daunting. Truth be told, that is often the turning point where the whole room starts feeling bright again.
If you are dealing with an oven that has heavy carbon build-up, stubborn burnt-on spills, or strong smoke when heating, a professional clean is usually worth considering. It is not about being fancy. It is about not turning a three-hour job into a miserable weekend.
Step-by-Step Guidance
Below is a practical, pro-style oven cleaning process you can use at home. It works best when you go methodically and give each stage enough time.
1. Let the oven cool fully
Never start on a warm oven unless the product instructions specifically allow it. A cool oven is safer to handle, easier to assess, and less likely to make cleaning products evaporate too quickly. Open the door and let it sit until it is completely cold to the touch. You do not want to be rushing this part.
2. Remove loose debris
Use a dry cloth or soft brush to lift out crumbs, ash-like residue, and any obvious debris from the base. Small bits left behind tend to get in the way once you apply cleaner. Pull out the racks, grill pan, and any removable trays. If the oven has side rails or panels that are designed to come out, only remove them if you are confident they can be refitted correctly.
3. Protect the surrounding area
Lay towels or newspaper on the floor near the oven if needed, especially if you are using a wet cleaning method. Wipe down the hob edges and handles too. Grease can spread in sneaky little streaks. It is annoying, but predictable.
4. Choose the right cleaning method
Most pros use one of three approaches: a commercial degreaser, a baking-soda style paste, or a specialist oven-cleaning service method that combines soaking, scraping, and residue removal. The best option depends on the level of build-up and the oven material. We cover the comparison later in this article.
5. Apply the cleaner and allow dwell time
Spray or spread the cleaner according to the instructions. Let it sit long enough to soften the grease. This is where people often rush, then wonder why nothing is shifting. Dwell time is not a suggestion. It is the bit where the product actually does the work.
6. Work on the racks separately
Racks usually need soaking in warm water with a suitable cleaner, then a non-scratch pad or brush. If they are heavily greased, repeat the soak rather than scrubbing aggressively. A bent rack is no one's idea of progress.
7. Agitate gently
Use a sponge, microfiber cloth, or soft non-abrasive pad. For stubborn spots, a plastic scraper can help lift carbonised residue without scratching enamel. Keep pressure controlled. Heavy-handed scrubbing is one of the fastest ways to make an oven look old before its time.
8. Clean the glass carefully
The oven door glass often holds the most visible grime, so it is worth taking your time. Apply cleaner, wait, then wipe in layers rather than trying to force everything off at once. If the inside of the glass panel is accessible and designed to be opened, check the manufacturer guidance first. Some doors are straightforward; some are not. Let's be honest, oven doors can be surprisingly dramatic.
9. Rinse thoroughly
Once the grime is removed, wipe all surfaces with a clean damp cloth to remove residue. Repeat if necessary. This step matters because leftover cleaner can affect smell or smoke the next time the oven heats up. Finish with a dry microfiber cloth so surfaces do not streak.
10. Reassemble and test briefly
Refit racks and trays, then run the oven empty for a short period if the product instructions recommend it. This helps clear any lingering moisture or faint product smell. If something does not sit correctly, pause and fix it before using the oven normally.
| Method | Best for | Pros | Trade-offs |
|---|---|---|---|
| Commercial degreaser | Moderate grease and routine maintenance | Fast, effective, widely available | Needs good ventilation and careful rinsing |
| Baking-soda style paste | Lighter grime and maintenance cleans | Gentler, inexpensive, useful for regular upkeep | Slower on heavy carbon build-up |
| Professional deep clean | Heavy build-up, rental move-outs, stubborn residue | Detailed, thorough, less hassle for you | Costs more than DIY |
Expert Tips for Better Results
Small habits make a big difference. This is where the pros quietly save time. Nothing glamorous, just smart sequencing and a little patience.
- Clean sooner rather than later: Fresh spills are much easier to remove than baked-on residue. If something drips, wait until the oven cools and deal with it before it hardens.
- Work from top to bottom: That way, loosened grime falls onto areas you have not cleaned yet.
- Use microfiber cloths for the final pass: They grab fine residue well and help reduce streaking on glass and enamel.
- Keep water use controlled: Too much liquid can drip into seals, hinges, or electrical areas. Damp, not dripping.
- Ventilate the room: Open a window if you can. Even mild cleaning products smell stronger in a compact kitchen.
- Try a second application on problem areas: Heavy patches often need two gentler rounds, not one aggressive attack.
One small trick that often helps: warm the cleaner slightly in your hands before applying it to a cold surface. It spreads more evenly. Not essential, but handy. Another practical point is to inspect the fan area and oven seals once you have finished. Those spots often get ignored, and that is where the "still looks dirty" feeling comes from.
If you are cleaning a particularly stubborn oven, take a break between stages. Seriously. A ten-minute pause can save you from over-scrubbing and getting fed up with the whole thing. There is no medal for finishing in record time.
Common Mistakes to Avoid
Most oven cleaning problems come from rushing, using the wrong product, or being too forceful. You can avoid a lot of trouble by steering clear of the following mistakes.
- Using abrasive pads on enamel or glass: This can leave scratches that are hard to hide and easy to regret.
- Mixing cleaning products: Never combine chemicals unless the label specifically says it is safe. That includes the temptation to "just add a bit more" of something else.
- Ignoring manufacturer guidance: Some ovens have self-cleaning settings, delicate coatings, or removable parts that need special care.
- Skipping the rinse stage: Residue left behind can smell unpleasant or smoke during the next cook.
- Cleaning while the oven is hot: It is unsafe and often makes the job messier.
- Forcing stuck racks or panels: If something does not move easily, check the manual rather than yanking it.
A less obvious mistake is treating every stain the same. Grease, sugar spills, and carbonised residue each respond differently. If one method is not working, change the approach rather than scrubbing harder. That simple switch saves both time and surfaces.
And yes, there is usually one awkward corner near the door seal that looks clean until the light catches it. That is just how ovens behave, apparently.
Tools, Resources and Recommendations
You do not need a huge kit to clean an oven well, but the right tools make the process smoother and safer. If you are assembling a sensible home-cleaning set, these are the items that actually earn their keep.
- Microfiber cloths: For wiping, polishing, and drying without leaving lint.
- Soft sponge or non-scratch pad: Good for lifting softened residue without damaging surfaces.
- Plastic scraper: Useful for stubborn spots on enamel or glass when used gently.
- Rubber gloves: Helpful if you are using stronger cleaning products or just prefer not to have stripped skin for the rest of the evening.
- Warm water and a bucket or bowl: For rinsing cloths and soaking racks.
- Degreasing cleaner or appropriate homemade cleaner: Choose one suited to the oven type and level of build-up.
- Towels or protective sheets: Handy to catch drips and protect the floor.
If you are comparing professional help with doing it yourself, have a look at services such as oven cleaning and oven cleaning services. For a wider housekeeping reset, it may also make sense to combine the job with one-off cleaning or spring cleaning. That is often the most efficient route if the kitchen needs more than a quick tidy.
If you like to keep everything local, a trusted cleaning company can be useful when time is tight or the oven is particularly neglected. Sometimes handing over the worst job in the house is just sensible.
Law, Compliance, Standards, or Best Practice
For a home oven, there is usually no special legal procedure for cleaning, but there are still sensible standards to follow. Safety, ventilation, product instructions, and material care matter. In the UK, consumers are generally expected to use cleaning products in line with the manufacturer's guidance and avoid unsafe chemical combinations. That is basic best practice rather than anything dramatic, but it is worth saying plainly.
If you are cleaning ovens in a rental property, a holiday let, or a communal building, it is wise to be careful with cleaning residues, odours, and surface condition. A landlord or managing agent may expect the appliance to be left in a hygienic, presentable state. Likewise, if you are paying for a professional service, check that the provider follows sensible health and safety practices, uses appropriate products, and protects surrounding surfaces.
For businesses such as kitchens, offices, or hospitality spaces, cleaning standards may be shaped by internal policies, insurer expectations, or general food-safety good practice. In those settings, the aim is not just "looks clean" but "clean enough to be used safely and consistently." If you are unsure, it is always better to ask for a method that suits the appliance and the setting rather than assuming a one-size-fits-all approach.
Where sustainability matters to you, consider whether the service or products used align with your household preferences. The site's recycling and sustainability information may also be useful if you are planning a broader clean and want to keep waste and packaging in mind. Small decisions add up.
Options, Methods, or Comparison Table
Different ovens and different levels of grime call for different approaches. There is no single "best" method for every kitchen, which is why comparison is useful.
| Approach | Time needed | Effort level | Best suited to | Notes |
|---|---|---|---|---|
| Quick maintenance clean | Short | Low | Light residue and regular upkeep | Works best when done often |
| DIY deep clean | Medium to long | Moderate to high | Homes with more built-up grease | Needs patience and careful rinsing |
| Professional oven cleaning | Usually efficient for the customer | Low for you | Heavy grime, time-poor households, move-outs | Often the most convenient option |
| Combined kitchen clean | Longer overall | Low to moderate for the homeowner | Full-room refreshes | Useful when the oven is part of a broader job |
For many people, the decision comes down to time, mess, and confidence. If the oven is lightly dirty, a methodical DIY clean is often enough. If it has years of build-up or you simply do not want the faff, a dedicated service is usually the calmer choice. There is no prize for suffering through it, honestly.
Case Study or Real-World Example
Picture a fairly typical family kitchen in west London after months of Sunday roasts, pizza nights, and a few spillovers nobody quite got to in time. The oven door looks cloudy, the grill tray is sticky, and every time it is turned on there is a faint burnt smell. Nothing dramatic, but enough to make cooking feel slightly grim.
The clean starts with a proper assessment. The racks come out first and soak while the cavity is treated with a suitable degreaser. A plastic scraper lifts the worst baked-on spots from the base, and the door glass gets a second pass because it shows the grime most clearly. After a careful rinse and dry, the oven looks brighter, but more importantly it smells neutral again when reheated.
What changed most was not just the appearance. The owners noticed they were using the oven with less hesitation. No more hovering at the door wondering whether last week's dinner was still smoking away inside. The kitchen felt fresher at 8 pm, not just after a deep clean. That is often the real win.
If a home is already due for wider attention, the oven clean can be paired with house cleaning or home cleaning so the entire space feels reset rather than just one appliance looking polished. A small thing, maybe. But a useful one.
Practical Checklist
Use this checklist before, during, and after cleaning so nothing gets missed.
- Let the oven cool completely before starting
- Read the manufacturer guidance if you are unsure about removable parts or self-cleaning modes
- Remove racks, trays, and loose debris
- Protect the floor and surrounding surfaces
- Choose a cleaner suited to the oven type and grime level
- Allow enough dwell time for the product to work
- Use non-abrasive tools on enamel and glass
- Rinse all surfaces thoroughly
- Dry everything before reassembling
- Check for leftover residue or missed corners
- Ventilate the kitchen during and after cleaning
- Schedule lighter maintenance cleans before grime becomes a big job
Expert summary: the best oven cleaning method is usually the one that fits the appliance, the level of build-up, and the amount of time you realistically have. Small, regular cleans beat heroic scrubbing most of the time. That is the bit people forget.
If you want a quicker route, or your oven has reached the "I'm not touching that without gloves" stage, a professional service can save time and spare you the mess. For a straightforward next step, you can review available pricing and quotes and decide whether to tackle it yourself or bring in help.
Get a free quote today and see how much you can save.
Conclusion
Spotless kitchens do not happen by accident. They come from a few practical habits done consistently: clean the oven before grime hardens, use the right product, rinse properly, and treat the appliance with care. That is the heart of practical oven cleaning methods pros use for spotless kitchens. Nothing flashy. Just sensible, repeatable work.
Whether you are keeping on top of a family oven, preparing for a move, or trying to get your kitchen back from months of baked-on residue, the same principle applies. Work methodically, avoid common mistakes, and choose the level of help that makes life easier. A clean oven gives you a cleaner room, a calmer routine, and one less job hanging over your head. And honestly, that is a pretty good feeling.
Frequently Asked Questions
How often should you clean an oven?
For regular home use, light cleaning every few weeks and a deeper clean every couple of months is a sensible rhythm. If you cook greasy meals often, you may need to do it more frequently. The key is not letting spills sit long enough to carbonise.
What is the safest way to clean a very dirty oven?
The safest approach is to let the oven cool, remove loose debris, use a product suitable for the surface, and work in stages rather than scrubbing aggressively. If the build-up is very heavy, a professional clean is often the least stressful option.
Can I use baking soda to clean my oven?
Yes, a baking-soda style paste can work well on lighter grime and general maintenance. It is gentler than stronger degreasers, but it usually needs more time and effort on stubborn, baked-on residue.
Are self-cleaning ovens easier to maintain?
They can help reduce deep cleaning frequency, but they still need regular wiping and attention to racks, door glass, and spillovers. Self-cleaning does not mean no-cleaning, unfortunately.
Should I clean oven racks separately?
Yes. Racks usually clean better when soaked separately in warm water with a suitable cleaner. That gives the main cavity more room to be cleaned properly and avoids missing greasy corners.
How do professionals remove burnt-on grease?
Professionals usually soften it first with a suitable cleaner, allow dwell time, then lift it with careful agitation and scraping where safe. The trick is patience, not force.
Will oven cleaning products damage enamel or glass?
They can if the wrong product is used or if you scrub too hard. Always choose products and tools that are suitable for your oven's surfaces, and avoid abrasive pads on delicate areas.
How long does a proper oven clean take?
That depends on the oven's condition. A light clean may take under an hour, while heavy build-up can take much longer. Professionals often work more efficiently because they have the right tools and a set process.
Is it worth booking a professional oven clean?
If your oven is heavily soiled, you are short on time, or you want a better finish with less effort, yes, it can be worth it. It is especially useful before moving out, after a big event, or as part of a broader kitchen refresh.
What should I avoid when cleaning an oven?
Avoid mixing chemicals, using abrasive pads on enamel or glass, cleaning a hot oven, and forcing stubborn parts free. Those are the common mistakes that tend to cause damage or frustration.
Can oven cleaning help reduce smells in the kitchen?
Yes. Old grease and residue can create unpleasant smells when the oven heats up. Removing that build-up often makes the whole kitchen smell fresher during cooking.
What if my oven still looks dirty after cleaning?
Check the hidden areas first: the door seal, side rails, fan cover, and the corners near the hinge. A second round on the stubborn patches may be needed. If the residue is carbonised and not shifting, a professional deep clean may be the simplest next step.